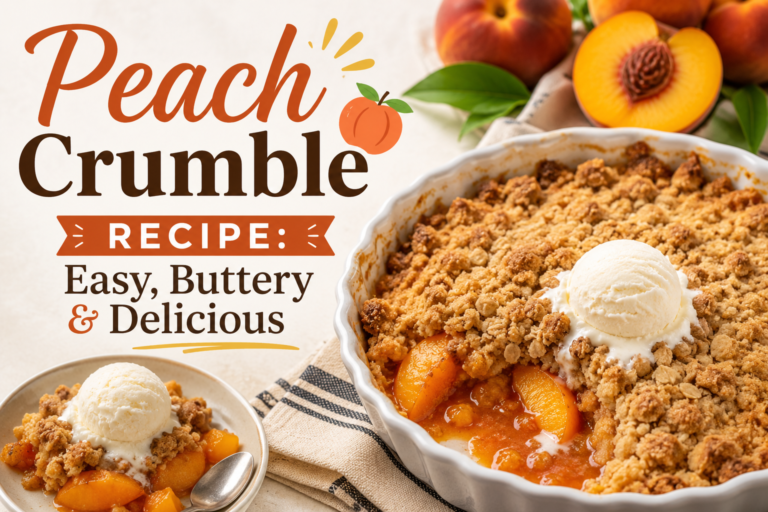
Easy Peach Cobbler Recipe Everyone Is Talking About
There’s a reason this specific peach cobbler recipe keeps getting shared.
It isn’t because it’s the fanciest version out there. It’s because it actually works — every single time, with almost no skill required, and with ingredients most people already have in the kitchen.
This recipe uses a method bakers have relied on for generations: pour melted butter into the pan, pour batter on top, spoon fruit over that — and do not stir. The batter rises up through the fruit as it bakes, forming its own crust naturally. No rolling pin, no pastry cutter, no biscuit dough to fuss over.
Below you’ll find the complete recipe, a version that works with canned peaches when fresh ones aren’t in season, answers to the mistakes that trip people up most, and everything else you need to make this exactly right on the first try.
Recipe at a Glance
| Prep Time | 15 minutes |
| Bake Time | 35–40 minutes |
| Total Time | About 50–55 minutes |
| Servings | 8 |
| Skill Level | Beginner-friendly |
| Equipment | One 9×13 inch baking dish, two mixing bowls |
“The secret to this cobbler isn’t a secret ingredient — it’s resisting the urge to stir.”

Why This Method Actually Works
Most cobbler recipes ask you to layer fruit on the bottom and batter or biscuit dough on top. That works, but it leaves you guessing whether the crust will cook through evenly, especially with a lot of juicy fruit underneath.
This recipe flips the order: butter first, batter second, fruit last. As the cobbler bakes, the batter rises up and around the fruit on its own — no spreading, no folding, no technique required. The fruit sinks slightly and caramelizes at the edges where it touches the hot pan, while the top stays golden and slightly crisp.
It’s essentially foolproof. The only real rule is: once you pour, stop touching it.
The Science Behind the Self-Forming Crust
This works because of how baking powder reacts with heat and moisture. When the batter hits the hot melted butter at the bottom of the pan, the baking powder activates immediately, creating bubbles that push the batter upward. Because the fruit is sitting on top as a separate, heavier layer, the rising batter has nowhere to go but up and around it — essentially encasing the peaches from below and the sides while leaving the very top of the fruit exposed to brown directly in the oven’s heat.
This is also why temperature matters so much here. A 375°F oven is hot enough to activate the baking powder quickly, before the batter has time to absorb too much liquid from the fruit and turn dense. Go much lower and you risk a flatter, heavier result. Go much higher and the top can brown before the inside has fully set.
Choosing the Right Peaches for Cobbler
Not every peach is built the same for baking. Freestone peaches — the kind where the pit separates cleanly from the flesh — are by far the easiest to work with, since slicing them is quick and you won’t waste fruit fighting with a stubborn pit. Most peaches sold at farmers markets and grocery stores in peak summer are freestone varieties.
Ripeness matters just as much as variety. A peach that’s slightly underripe will hold its shape better during baking but will need a touch more sugar to balance its tartness. An overripe, very soft peach breaks down faster and releases more juice — which works fine here, since the slotted spoon step in this recipe already accounts for some liquid drainage. What you want to avoid is a peach that’s still hard and green-tinged near the stem; those won’t soften properly even after 40 minutes in the oven, and the flavor stays underdeveloped.
If you’re shopping ahead of time and your peaches feel firm, leave them at room temperature in a single layer, stem-side down, for one to three days. They’ll continue to ripen off the tree, and a few days of patience makes a real difference in the final flavor of this cobbler.

Why the Lemon Juice Matters More Than You’d Think
It’s easy to assume the tablespoon of lemon juice in the filling is purely there to prevent browning, but it’s doing more work than that. The acidity actually sharpens and brightens the overall flavor of the cobbler, cutting through the sweetness of the sugar and butter so the peach flavor itself doesn’t get lost. Leave it out entirely and the finished dessert tends to taste flatter and one-dimensionally sweet, even though nothing else in the recipe changed.
🍑 The Full Recipe: Classic Fresh Peach Cobbler
Ingredients
For the peach filling:
- 6–7 large ripe fresh peaches, peeled and sliced (about 6 cups)
- ¼ cup (50g) granulated sugar
- 1 tablespoon fresh lemon juice
- ½ teaspoon ground cinnamon
- ¼ teaspoon ground nutmeg
For the batter:
- ½ cup (115g) unsalted butter
- 1 cup (125g) all-purpose flour
- 1 cup (200g) granulated sugar
- 1 cup (240ml) whole milk
- 1 tablespoon baking powder
- ¼ teaspoon salt
Optional finishing touches: 1 tablespoon of coarse sugar sprinkled on top before baking for extra crunch, or a scoop of vanilla ice cream once it’s out of the oven.
Step-by-Step Instructions
- Preheat and melt the butter. Preheat your oven to 375°F (190°C). Place the butter in a 9×13 inch baking dish and put it in the oven while it preheats — just long enough for the butter to fully melt. Watch it closely; remove the dish the moment it’s melted so the butter doesn’t brown or burn.
- Prepare the peaches. In a medium bowl, toss the sliced peaches with ¼ cup sugar, lemon juice, cinnamon, and nutmeg. Set aside while you make the batter — this gives the peaches time to release a little juice and soften slightly.
- Make the batter. In a separate bowl, whisk together the flour, 1 cup sugar, baking powder, and salt. Pour in the milk and whisk until completely smooth with no lumps.
- Pour the batter over the butter. Pour the batter directly into the baking dish, over the melted butter. Do not stir. The butter should pool around the edges — that’s exactly what you want.
- Add the peaches. Using a slotted spoon, spoon the peach mixture evenly over the batter, distributing the fruit across the entire dish. Again — do not stir. Some juice will pool on top, which is normal.
- Bake. Place in the oven and bake for 35–40 minutes, until the top is deep golden brown, the edges are bubbling and slightly crisp, and a toothpick inserted into the batter (not the fruit) comes out clean.
- Rest and serve. Let the cobbler rest for 10 minutes before serving — this allows the juices to settle and makes serving much easier. Serve warm, ideally with a scoop of vanilla ice cream or a dollop of fresh whipped cream.

🥫 The Canned Peach Version (Just As Good, Even Faster)
Fresh peaches aren’t always available — and honestly, a well-made canned peach cobbler can be just as good. The trick is managing the extra liquid and sweetness that comes in the can, which most recipes ignore and which is exactly why some canned versions turn out soggy.
Ingredients
- 2 cans (29 oz each) sliced peaches in light syrup, well drained
- 2 tablespoons reserved peach syrup (from the can)
- 1 tablespoon fresh lemon juice
- ½ teaspoon cinnamon
- ½ cup (115g) unsalted butter
- 1 cup (125g) all-purpose flour
- ¾ cup (150g) granulated sugar (reduced from 1 cup, since canned peaches are already sweetened)
- 1 cup (240ml) whole milk
- 1 tablespoon baking powder
- ¼ teaspoon salt
Instructions
- Drain the peaches thoroughly — this is the single most important step for canned peach cobbler. Use a colander and let them sit for 5–10 minutes, pressing gently to remove excess syrup. Reserve 2 tablespoons of the syrup separately.
- Toss the drained peaches with the 2 tablespoons reserved syrup, lemon juice, and cinnamon. Skip adding extra sugar to the fruit — canned peaches are already sweet enough.
- Follow the exact same method as the fresh version: melt butter in the preheated dish, pour in the batter without stirring, then spoon the drained peaches on top without stirring.
- Bake at 375°F (190°C) for 30–35 minutes — slightly less time than the fresh version, since canned peaches are already soft and don’t need as long to break down.
- Rest for 10 minutes before serving, exactly as with the fresh version.
Why this version works: Draining the syrup is what most rushed versions skip — and it’s exactly why those versions come out watery. Removing the excess liquid lets the batter rise properly instead of getting waterlogged from underneath.

5 Mistakes That Ruin a Peach Cobbler
1. Stirring the Batter and Fruit Together
This is the single biggest mistake. The entire method depends on the batter and fruit staying in separate layers so the batter can rise up around the peaches. Stir them together and you’ll end up with a dense, soggy mess instead of a self-forming crust.
2. Not Draining Canned Peaches Properly
Skipping the drain step is the number one reason canned peach cobbler turns out watery and undercooked in the middle. Take the extra five minutes — it makes a real difference.
3. Using Underripe Peaches Without Adjusting
Underripe peaches are tart and release less juice. If yours aren’t fully ripe, add an extra tablespoon of sugar to the fruit mixture and a touch more lemon juice to balance the flavor.
4. Pulling It Out Too Early
The top needs to be deep golden — not pale — for the inside to be fully cooked through. If you pull it too early, the center stays gummy. When in doubt, give it another 5 minutes; cobbler is far more forgiving of overbaking than underbaking.
5. Skipping the Resting Time
Cutting into the cobbler straight out of the oven means the juices haven’t had time to settle. Ten minutes of resting makes serving cleaner and actually improves the texture as it sets slightly.
6. Using a Pan That’s the Wrong Size
A 9×13 inch dish gives the batter enough surface area to rise properly without becoming too thick in the middle. Using a smaller, deeper dish traps moisture and often leaves the center undercooked even when the top looks done. If a 9×13 dish isn’t available, two smaller 8-inch square dishes work as a reasonable substitute — just check for doneness a few minutes earlier since they’ll bake faster.
What to Serve With Peach Cobbler
On its own, this cobbler is plenty satisfying — but a few simple additions turn it into something that feels genuinely special for a gathering.
- Vanilla ice cream is the classic pairing for good reason — the cold cream against the warm fruit is the entire appeal of a cobbler in the first place.
- Fresh whipped cream with a touch of vanilla extract is a lighter alternative that still adds richness without melting into a puddle the way ice cream sometimes does.
- A drizzle of caramel sauce over the top right before serving deepens the sweetness and pairs especially well with the bourbon variation mentioned below.
- A short espresso or strong black coffee on the side cuts through the sweetness nicely if you’re serving this after a heavier meal.

Easy Ways to Customize This Recipe
Once you’ve made the base recipe once, it’s easy to adapt. Here are a few simple variations worth trying.
| Variation | What to Change |
|---|---|
| Peach Blueberry Cobbler | Replace 1 cup of peaches with 1 cup fresh blueberries |
| Bourbon Peach Cobbler | Add 2 tablespoons bourbon to the peach mixture |
| Spiced Peach Cobbler | Add ¼ teaspoon ground ginger and ⅛ teaspoon ground cloves |
| Brown Sugar Cobbler | Swap half the batter sugar for packed brown sugar — adds caramel depth |
Storing and Reheating Leftovers
- Room temperature: Covered, up to 1 day — fine for same-day or next-morning eating.
- Refrigerator: Covered tightly, up to 4 days.
- Freezer: Wrap individual portions tightly and freeze up to 3 months. Thaw overnight in the fridge before reheating.
- Reheating: Warm individual portions in the oven at 350°F (175°C) for 10–12 minutes for the best texture. The microwave works too but the crust loses its crispness.
⭐ Key Takeaways
- The order matters: melted butter first, batter second, fruit last — and never stir the layers together.
- This recipe works equally well with fresh or canned peaches, as long as canned peaches are drained thoroughly first.
- Bake until the top is deep golden brown, not pale — pulling it too early is the most common cause of a gummy center.
- Let the cobbler rest for 10 minutes before serving so the juices settle properly.
- Reduce added sugar when using canned peaches in syrup, since they’re already sweetened.
- Leftovers keep well in the fridge for up to 4 days and reheat best in the oven, not the microwave.
A Note on Oven Temperature Accuracy
Most home ovens run a little hot or a little cool compared to what the dial actually says — sometimes by as much as 25 degrees. If you’ve made this recipe before and found it consistently needed more or less time than stated, that’s almost always the reason. A cheap oven thermometer placed on the middle rack solves this permanently and is worth the small investment if you bake more than occasionally. For this particular recipe, an oven running hot will brown the top before the center finishes setting, while a cool oven will leave you waiting closer to 45 minutes for that deep golden color to develop.
Conclusion: This Is the Last Peach Cobbler Recipe You’ll Need
There’s a reason this exact method has been passed around kitchens for generations — it removes every variable that usually goes wrong with cobbler. No crust to roll, no biscuit dough to cut, no guessing whether the layers will cook evenly.
Whether you’re working with peaches fresh off the tree or a couple of cans from the pantry, the process is the same: melt, pour, spoon, bake, and don’t touch it in between. That’s genuinely the whole recipe.
Make it once this week. There’s a good chance it becomes the only peach cobbler recipe you ever need again.
“Some recipes get complicated because they try to impress. The best ones get simple because they’ve already proven themselves.”
Frequently Asked Questions

My name is Hamza Waheed, and I am an SEO expert with over 7+ years of experience in search engine optimization and the keto blogging industry. I specialize in creating SEO-driven content focused on keto recipes, low-carb living, and organic traffic growth. I combine technical SEO skills with practical health and nutrition content to deliver useful and engaging information for readers.